Estimated Reading Time: 13 minutes
If you're reading this with water dripping into a bucket on the warehouse floor, or into a cooking pot in the kitchen under your flat porch roof, skip ahead to the checklist below and start at step one. Come back for the details once the water is contained.
For everyone else: a flat roof leak never announces itself at a convenient time. We've taken emergency calls during Sunday services, in the middle of third shift, and once at 11 p.m. on Christmas week. And this guide is not just for commercial buildings. Flat sections show up on homes all over Michiana: porch roofs, garage roofs, sunroom additions, and entire flat-roof houses. They leak the same way warehouses do, and the first 24 hours work the same way too.
What you do in that first day decides whether you're paying for a patch or paying for a patch plus ruined belongings, soaked insulation, and a mold problem.
Here are the same steps we walk callers through on the phone, in the order to do them.
The first hour, at a glance
Make the area safe. Electricity, slips, and sagging ceilings hurt people faster than water hurts buildings.
Contain the water and get valuables out of the drip path.
Start documenting. Photos and timestamps, before anything gets moved or dries up.
Only go near the roof if it's genuinely safe, and only for the limited moves listed below.
Call a commercial roofer. Have your notes and photos ready when you do.
Now the details, because the details are where money gets saved.
Step 1: Make the area safe
Water and electricity are a bad mix, so if water is anywhere near outlets, panels, lighting, or powered equipment, kill the power to that zone at the breaker before you do anything else.
Block off the wet area. Wet concrete and tile get slick fast, and a fall costs a lot more than a leak. If you see a ceiling tile or drywall section bulging with trapped water, don't stand under it and don't let anyone else stand under it. A drop ceiling tile full of water will come down on its own eventually. The controlled version is easier: take the tile down or poke a small hole in the low spot with a bucket underneath. A ceiling tile costs a few dollars. The cleanup after one lets go over a workstation does not.
One caution on that trick: if the ceiling is drywall and showing a big sag, or if you're looking at cracked plaster or water staining that spreads along joists, leave it alone and keep people out. That's a conversation for the roofer and possibly a structural look, not a screwdriver.
Step 2: Contain the water
Get everything you can out of the drip path. In a commercial space that means inventory, electronics, paperwork, machinery, finished goods; forklift the pallets if you have to. In a home it's furniture, rugs, computers, the TV, and whatever is in the attic or garage directly under the flat section. Anything that can't move gets plastic sheeting or a tarp over it.
Then catch what's coming in. Five-gallon buckets, trash cans, plastic totes, whatever holds water. Put something under the drip and something around it, because splashing spreads damage a few feet in every direction. Wet-vac standing water off the floor once it's contained.
Work with some urgency here, and not just because of the mess. Mold can get established in damp materials in as little as 24 to 48 hours, and once it's in wall cavities or ceiling insulation, "roof repair" turns into "remediation project." That's when a few hundred dollars of urgency becomes thousands.
Step 3: Document everything, starting now
Before you move things, mop things, or patch anything, take photos and video. Then keep taking them as the situation develops.
Get the active drips and any standing water. Get the damaged inventory and equipment, close up and wide. If you can safely see roof-level damage from a hatch, window, or mezzanine, get that too. Note the time you discovered the leak and who found it; there's a real difference in a claim between "found at 7 a.m. Monday" and "unknown."
Keep every receipt from this point forward: tarps, buckets, wet-vac rental, the roofer's invoice, all of it.
This matters just as much on a house as on a warehouse. Homeowners insurance treats a sudden roof leak a lot like a commercial policy does: the storm that tore the flashing loose is usually covered, while the leak that was ignored for six months usually isn't.
A word on how claims work with us, since people ask every time: Tru-Kote documents emergency calls with photo reports and a written repair proposal, and you submit those to your insurance as part of your claim. We don't work as a middleman with the insurance company; the claim stays yours. Thorough documentation on day one is what makes that process go smoothly instead of becoming an argument. Commercial owners can go deeper on this in our post on how a leaking roof can lead to insurance claim denials.
Step 4: What you can do on the roof, and what you really shouldn't
First the line you shouldn't cross: never go on a commercial roof during active rain, lightning, high wind, ice, or after dark. A wet single-ply membrane underfoot is closer to ice than to pavement, and most commercial roofs have no railings. No leak is worth a fall. Interior containment buys you time; a roof rescue attempt doesn't.
If weather has passed and access is safe, there are exactly two moves we consider reasonable for a capable building manager:
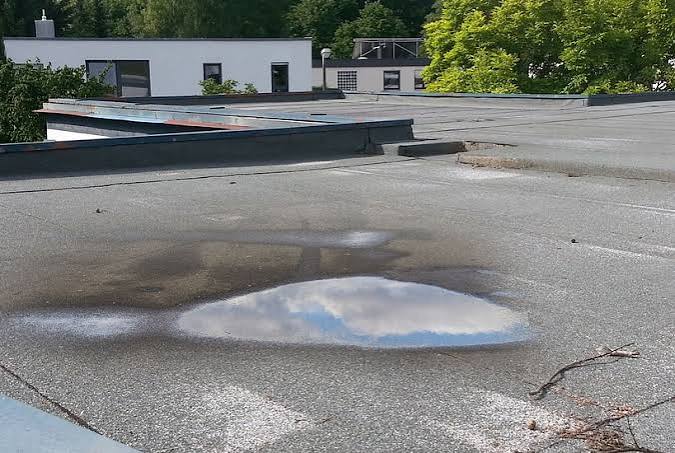
Clear a clogged drain, scupper, or gutter you can reach easily. A surprising share of "roof failures" are really drainage failures, and ponding water finds every weak seam on the roof. Pull the branch or ice off the drain and you may watch the leak slow within minutes.
Lay a weighted tarp over the damaged area, extending at least three feet past it on all sides, with the uphill edge secured so wind can't get under it. Weights, not screws. Driving fasteners into the membrane to hold a tarp creates the next five leaks.
What about roof cement and hardware-store patch kits? They have their place, and that place is a dry, clean surface and a small, confirmed puncture. In an active leak with water in the system, smearing mastic over a wet seam mostly traps moisture inside the roof and gives the next crew a mess to scrape off before they can weld a real patch. Peel-and-stick products fail the same way on a wet surface. If conditions don't let the patch bond, you're decorating, not repairing.
There's one more reason DIY diagnosis goes wrong, and it surprises people every time: the hole in the roof is almost never directly above the drip inside. Water enters at a failed seam, runs along the deck or a purlin, and shows up inside ten or fifteen feet away. Owners patch the wrong spot, water keeps coming, and now there are two problems. Finding the actual entry point takes experience and sometimes a moisture scan. It's why step five exists.
Step 5: Call a low-slope roofer, and make the call count
Emergency or not, flat roofing is its own trade. That's true on a warehouse, and it's just as true on the membrane roof over your porch, garage, or addition. A shingle crew is not the right call for either one. You want a contractor who works on low-slope membrane systems every week, carries proper insurance, and can do the temporary dry-in now and the permanent repair after.
You'll get a faster, better response if you can answer these questions when you call:
Where the building is and how to get rooftop access
What type and roughly what age the roof is, if you know
Where water is showing inside and how much is coming in
Whether any areas have lost power or have sensitive equipment at risk
Your photos, texts, and timestamps from step 3
Here's what a legitimate emergency response actually looks like, so you know what you're paying for. The first visit is about stabilization: locate the entry point as best conditions allow, get the building dried in with a proper temporary repair, and document conditions with photos. A real permanent repair follows after, with a written proposal, when surfaces are dry and materials will actually bond. Be skeptical of anyone who promises a permanent welded patch in standing water. Chemistry doesn't care about their confidence.
Is it actually an emergency?
People ask us this a lot, usually while talking themselves out of a phone call. Our line in the sand:
Call now, today, if water is actively coming in. That includes a warehouse aisle, but also a bedroom ceiling, a kitchen under a porch roof, or a finished garage. Same call if water is anywhere near electrical systems, if ceiling material is sagging, or if the leak follows visible storm damage like a puncture or peeled-back flashing.
Schedule urgently but not at emergency rates if you have a slow drip that only appears in heavy rain, a stain that's growing but dry right now, or a musty smell with no visible water yet.
The category that is not on this list is "ignore it and see." A drip that waits until spring is how you buy new insulation and decking along with your patch. We covered the real math on that in the hidden cost of ignoring a small roof leak.
What emergency roof repairs cost around here
Ballparks, because every roof is different, but you deserve honest numbers:
Emergency response and temporary dry-in: typically a few hundred dollars for the call and basic stabilization, often [your service-call range here], more after hours, on weekends, or in winter conditions
Small permanent repairs (a patch, a section of seam, flashing around one penetration): commonly $500 to $1,500
Larger repairs (multiple areas, drainage corrections, wet insulation replacement): $1,500 to $5,000 and up
In the worst cases where water has been in the system a long time, the repair conversation can turn into a recover or replacement conversation, which is a different budget entirely
On a house, the numbers usually sit at the lower end of those ranges, simply because a porch, garage, or addition roof is a smaller area than a commercial building. Same logic on the stakes though: a $400 garage roof repair beats a soaked garage ceiling, a mildewed workbench, and whatever was stored in the rafters.
Two things move the price more than anything: how long the leak ran before the call, and whether the insulation under the membrane got wet. Both are arguments for calling sooner.
Also expect emergency work in an Indiana January to cost more than the same repair scheduled for a dry April. That's not gouging; heat welding at ten degrees with wind is genuinely slower work, and winter daylight is short.
After the emergency: fix it for real, then make it the last one
Once the building is dry, the temporary repair has an expiration date. Tarps shift. Temporary seals fatigue. Schedule the permanent repair while the emergency visit is still fresh, and ask for the photos and proposal in writing so your records and your claim file stay complete.
Then take the lesson seriously. Nearly every emergency leak we respond to has a backstory of something small: a seam that had been lifting for a year, a drain nobody had checked, a puncture from a contractor's dropped tool last summer. A roof that gets an inspection every spring and fall almost never surprises its owner. It just quietly does its job.
That's the honest goal: not a heroic emergency response, but a building that never needs one.
Questions we get on emergency calls
Is a small roof leak really an emergency?
It depends where it's leaking and how fast. Water near electrical systems, production equipment, or a sagging ceiling section is an emergency today. A slow drip that only shows up in hard rain can usually wait for a scheduled visit, but it can't wait forever. Wet insulation turns a $500 repair into a $5,000 one.
Can I repair a flat roof leak myself?
Interior containment, clearing an accessible drain, and a weighted tarp are reasonable DIY moves in safe conditions. Actual membrane repair usually isn't. Patch materials don't bond to wet or dirty surfaces, the leak source is often feet away from the interior drip, and improper repairs can void your membrane warranty.
How much does emergency flat roof repair cost?
In Northern Indiana, the emergency visit and temporary dry-in typically run a few hundred dollars, with most permanent repairs landing between $500 and $5,000 depending on how much damage the water did before the call. After-hours and winter work costs more.
Will insurance cover the repair?
Usually the sudden damage, yes: storm damage, a puncture, wind-torn flashing, and the interior harm it caused. What policies typically won't cover is deterioration from a leak that was ignored for months, which is why same-day documentation and prompt repair matter so much to a claim. We provide detailed photo reports and proposals for you to submit, and the claim stays in your hands.
Can a flat roof be repaired while it's raining or snowing?
The building can be stabilized in almost any weather with tarps and temporary measures, and we do that year-round. Permanent repairs like welded patches need a dry surface to bond, so they're scheduled once conditions allow. Any contractor promising a permanent weld in standing water is telling you what you want to hear.
How fast can a crew actually get here?
For active leaks in our Michiana service area, our goal is same-day response, and after-hours calls go to the on-call crew. The more detail you can give on the first call, the fewer surprises slow things down on site.
Do you repair flat roofs on houses, or only commercial buildings?
Both. A leaking flat section on a porch, garage, addition, or a full flat-roof home gets the same response as a warehouse: stabilize it first, document the damage, and put a permanent repair in writing. Low-slope roofing is its own specialty, and it's most of what we do. You can see more on our residential roofing page.
Water's coming in. Here's the number.
Tru-Kote Roofing Systems handles emergency flat roof repairs across Elkhart, South Bend, Mishawaka, Goshen, and the greater Michiana region, on commercial buildings and homes alike. We stabilize the leak, document everything for your insurance, and come back with a permanent fix, in writing.
For an active leak on your building or your home, call us: (574) 536-4326
To schedule an inspection before the next storm does it for you: request your assessment here
By Doug Martin, Tru-Kote Roofing Systems. Tru-Kote is a Duro-Last Elite Certified commercial roofing contractor serving Northern Indiana and Southwest Michigan. Related reading: the hidden cost of ignoring a small roof leak and our emergency leak response service.